Tuesday, August 21, 2012

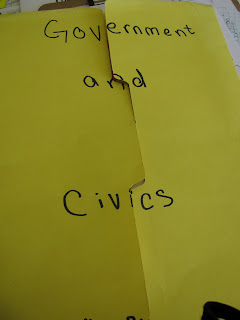
Government and Civics Lapbook

We're back at it with lapbooks! After last year's very successful venture with lapbooks during our WWII unit, I have decided to try to integrate it more in all (or most) of our Social Studies units this year. Our very first unit is Government and Civics so we jumped into lapbooks right away! Today is our unit test and I'm anxious to see how we did!
According to the Tennessee standards the students are to identify and explain each of the three parts of the constitution; the preamble, the articles, and the Bill of Rights. Within each section students should understand the purposes, the branches of government, the levels of government (local, state, federal) and their individual responsibilities. We will be adding amendments to the pocket on the right as we progress through American history. By the end of the year we'll have amendments 13, 14, 15, 16, 18, 19, 21, and 25 (in addition to the Bill of Rights).

We examined the preamble and then dissected what the preamble tells us about the constitution. We used dictionaries, thesauruses, and prior knowledge to help make it more meaningful. 
 
How a bill becomes a law
We of course watched the School House Rock song, but we learned more in depth about the process. To incorporate writing we worked on persuasive writing and wrote letters to our congressperson about ideas we had to make East Tennessee/Johnson City a better place. We wrote the process out like a timeline. 


Branches of the Government
This is a pretty straight forward flipbook. The only modification I made was to have them split the legislative door into two parts (senate and house of representatives).


Another focus of Tennessee standards is to analyze how the state government was set up to mirror the federal government. We did this through examining the two constitutions and looking for similarities and differences.

 
Levels of Government
The circles were made using a cardstock stencil that I made and the students can cut and assemble with a brad. I like how they interlock with each other to show smallest to largest and how the local government must still work within the state government's constitution (etc). 
 
The Bill of Rights
I'd mentioned on a previous post how we go about learning the Bill of Rights. This is the flip book that we made to keep the information in our lapbooks. I traced the alphabetical organizer cards from an index card box and then made lines and numbered them. The students then just had to cut them out and assemble to prepare to write down the information. 


This pocket will be used for the additional amendments we learn about as we progress through American History! 

I hope you see something that you might be able to take away and try in your classroom! Although some of this is specific to Tennessee I'm sure there are parallel lessons that could be done for any state. 

Mrs. J

This is a (somewhat) new blog. Follow me to get updates! 


Friday, August 10, 2012

We the Peeps of the Classroom...

So begins our classroom constitution... "We the peeps of the classroom..." Setting up a functional classroom is such a challenge and classroom rules are a big part of what makes a classroom successful (or disastrous). I wish I knew more how to do this as a first year teacher because my first year was... rough. Mostly because I didn't know how to set up the classroom. I could manage one just fine during student teaching, but starting with a bunch of blank-slates staring at me was overwhelming to say the least.
Day 1
As part of my state's Social Studies curriculum, the 5th grade has a large focus on the United States Constitution, its purposes, and its parts. So, three years ago I started setting up my classroom rules into a "Constitution" and integrating a lot of my Social Studies content. It takes about three weeks in all (but I was out for a three day training in the midst of that) which seems like a long time, but we always had a "draft" form of our rules to guide our behavior and the student "buy in" is phenomenal. I'm going to break it down into little pieces so you can see how this all grew into our full constitution we have today.

Day 1: In our Morning Meeting we had a discussion about our hopes and dreams for the fifth grade. What do you hope to accomplish? How do you want this year to be different? We did a think-pair-share where each student had to come up with an academic goal and a non-academic goal for this year. Once we had all shared we summarized what we heard on to our list.

Days 2/3
Days 2/3: Again in Morning Meeting, we discussed how we could help each other accomplish these goals through our actions. We tried to keep it all framed in the positives because it would be very easy to get negative (and also to go off on rabbit trails). "Don't spit." "Don't kick" "Don't Punch." is well covered in "Be in control and think about your actions."

The next day we took a look at our rules and tried to see if any of them related to each other. The students color coded them by how they saw the relationships. In the picture you can see that all of the "Be nice..." theme rules were colored in orange. This list served as our rules until our official copy was made. These eventually became our "Articles" in the Constitution.

Day 4/5: Morning Meeting/Social Studies

We started studying the Preamble to the Constitution. We did many things, but one of things that I think was most useful was breaking the Preamble down line by line and examining what it means. We used prior knowledge,  dictionaries, and thesauruses to figure out all those fancy vocabulary words to finally get down to the "nitty-gritty" of why the Constitution was written. We put this in our Government Lapbook that we are building together.


Day 6: Students write a preamble for our own Constitution. They had to think about why we need rules and how they help us accomplish our goals. They worked in teams to break it down for themselves and I encouraged to make it in their own language. The teams then displayed their preambles and students went around with post-it notes making comments about which parts they liked from each preamble. Then together, we picked the best of each one and made a combined preamble. This is ours...

Day 7-12: We begin our study of The Bill of Rights. There are many things that we do to study Amendments 1-10, but my favorite is to do the hand motions while we learn them. You can see them HERE. I've added some and changed a few (because it doesn't address all of them), but essentially they are the same.
Another of  my favorite things to do is assign each student an amendment (or a part of an amendment such as 'freedom of speech') and have them create a poster that contains three things. First, the poster must state the right that the amendment is protecting, then the remaining 
two are to be drawings. One drawing shows what life is like with the amendment in action. The second drawing shows what life would be like without the amendment. I'm very clear that I accept stick figures, but they must be stick figures in very clear and detailed situations  These usually end up more in comic form which is great. Then we do a museum walk to enjoy our classmates work. 
Museum Walk
Days 13/14: We bring it all together at Morning Meeting as soon as we finish the Bill of Rights and we wrote down our inalienable rights that we have in the classroom. This year's class was not as easily led by me as last year's class was so there were a few that I had to just about give them, but they still think they came up with it, so I'm pleased. We added it to our constitution. The following day we all voted to ratify the Constitution and signed it into law. 

They are so proud of the Constitution and will talk about it with anyone who visits our class. It's been great for management too. The students have really bought in to the whole concept and have been referencing it when students are making bad choices. Hopefully this continues, but I'm thinking this is going to be a great year! 
Our complete (and massive) constitution! 


Monday, July 23, 2012

Welcome to the 2012-2013 School Year!

Hello friends!!

I'm back in the swing of things and I'm really looking forward to an exciting year of teaching and learning both in my classroom and on my blog! Thank you to those that started following me over the summer break. I'm sorry if I didn't get back to you on a post or comment, but with a year-round calendar when I'm out for summer, I'm O-U-T! We've been back in session since July 9th! When I worked at a traditional school I'd always look on-line for ideas (before the days of Pinterest) and then start heading in to my classroom a week or two before the kiddos showed up. Well, my summer break was a whopping THREE weeks in all this year and I was going to enjoy every. last. minute. of it!!


Go up or down. It's up to you!
First, I'll show off some of the things that I've made and I really have LOVED using so far this year. I, of course, found this classroom management idea on Pinterest and had to make it a bit of my own.  The premise is simple, move up for good behavior and down for bad. The reason I like this better than those that only have down as an option, don't really highlight those students that go above and beyond each and every day. I've learned that I need to do a better job of pointing it out when I notice students that are being kind and compassionate, respectful and responsible, and doing what is supposed to be done not just because they're in danger of getting a yellow, but because it's become part of their nature. Those are the kids that I feel get left out of the other systems.

If you work your way up to "Role Model" you get one of these cards that I had made at (of course) VistaPrint! I love them. The language on the back comes straight from our school's Responsive Classroom character traits.
Students return their signed cards
to the Role Model jar


Students have parents sign the back and return it to the "Role Model" bin. At the end of the month I'll pull three cards and those students will get a bonus treat (homework pass, lunch with friend, etc). 
Also, if you get to "Role Model" ten times you can upgrade your clip. Of course I had to paint mine with sparkly paint to make them special! They work their way up to a gold clip (the gold looks silver in the picture).

The language on the sign is intentional as well. I didn't want to put the consequences on the lower levels because I really want to leave that up to my professional judgment. If someone has gotten to a yellow every day this week I might call home (even if that isn't listed until the red level), or if it's someone's first offence for the day and it's violent or wildly unacceptable I want to be able to send them to the office or have a more serious consequence without feeling like a hypocrite to those other students that had a different consequence come their way. I try to be fair (as we all do), I just liked this better... but that's just me. For the most part yellow is warning, orange is partial loss of recess and a conduct slip, and red is a parent phone call or office referral. 

I'm really excited to share with you more of what I've been up to in my classroom for the last few weeks, but I must go home and snuggle with my furry-babies for a bit. It's been a LOOONG day.  

Until next time, 
Jill

I'm still new to the blog-o-sphere. Follow me to get updates! 


Monday, April 16, 2012

WWII Lapbooks

How many of you have heard of "lap-books"? I don't know how I have missed out of these for so many years, but thanks to Pinterest I've been brought into the light! Lapbooks are (to my understanding) interactive notebooks where students can keep all the information on one topic in one place. The lapbook contains many mini-books or foldables and makes the whole note-taking process more creative and thus more enjoyable. Around Christmas I started researching lapbooks and couldn't find the large resource for middle grades that I had hoped was out there. I knew I wanted to make one for WWII so I started planning mine out long before I knew we would start the unit with the students. 
One file folder with an additional half attached
Closed
My main focuses in WWII according to the TN standards are the causes, key participants, the Holocaust, Japanese internment camps, and the atomic bomb. There is a secondary (lasting big idea) that is to focus on how WWII lead to the United States being more involved in international issues and wars but that's asking a lot of a little lapbook made from a file folder!  
Open View 1 (The map is doubled:
There is a hidden map beneath with
the Pacific Theater of Battles)
Open View 2
For this lapbook, it required one and a half file folders. The only pre-assembly that was done before passing them out to students was to tape the extra half of a file folder to the top to make the extra flap. Other than that, the students each made all their mini-books themselves. This was very much a cumulative activity. Each foldable directly related to a lesson so it was built piece by piece. If I tried to have them make all the foldables in one day I would not be blogging you from my classroom. I'd be blogging from prison after going on a rampage about folding, cutting, stapling, and taping in the wrong spot. That would certainly be more memorable, but alas I took the slower option. 

     Leadership during WWII
Frayer Model


Propaganda


The Atomic Bomb:
A picture of the atomic bomb was cut and then adhered to each level of the What? Where? When? Why? so that when all doors opened you can see the picture in full effect.  


The Nazi State and the Holocaust:
The foldable on the right is a pyramid that lies flat when not in use


The Homefront
 This one was probably my favorite. Probably because I think it's the cutest. It's a house with a roof that expands to show all the different things Americans were doing at home to help the war efforts.


 Our focus on the Japanese Internment Camps was, of course, what they were, but also how they stood in direct contrast of what we were fighting for and against. 

Timeline: I used register tape to make the timeline. Students completed an activity where they first had to put given events in order and then place them in the correct place on the timeline. 


I've got the rumblings of an idea for next year trying to make a lapbook for each of our eras that we do in Social Studies. Then come TCAP time we just have to take out our lapbooks and we've got great study materials all in one place (unlike their mess-of-a-binder that they've got this year). We'll see how I feel about it when I'm trying to plan it all. Sometimes my Pinterest "eyes" are bigger than my real-life ability levels.

Hopefully this is something that can get you started thinking about using lap-books in your upper grade classrooms!

Until next time,
Mrs. J

Thursday, April 12, 2012

Hot Particle - Cold Particle Tag

I'm sorry I've been missing these past few weeks. TCAP is around the corner and it seems to be all I can do to make it through the day! Today was a fun day though and I wanted to come and share some of our learning with you.
Heat Transfer!

We've been studying Heat and yesterday's lesson was on how heat moves (hot to cold, etc). The kids all got to enjoy my complete and utter lack of drawing skills as we entered examples of conduction, convection, and radiation into our notes. Friends that I play "Draw Something" with can bear witness to my skill-level. Well, today as a review we played Hot Particle-Cold Particle Tag.


Here's how we play it. 
1. Half of the students are designated as hot particles, while the other are cold particles.
2. The cold particle students have a piece of paper clipped to the back of their their shirt. The hot particles are given 10 stickers.

The Goal:
Five Heat Particles!
Students play a game of "tag" where the hot particles are to give away their heat (their stickers) to the cold particles until they are at equilibrium with all heat particles having five and each cold having five. Once the heat has given away five or the cold has five on it, students are to sway in place.

A few rules we made:
I had a set zone for students to run in.
Once tagged, the cold particle had to stand still so the heat could transfer (stick).
A cold particle had to be given a head start if they just got a sticker--no attacking someone just because someone else had tagged them.

It was a lot of fun and it only took like 10-15 minutes and it got us outside so I'm happy. :-) When we returned to class we did a bit more on the study of Heat, but their ticket out the door was to relate the game to what we know about how heat travels. After reading their responses, I know a few misconceptions that I need to address, but overall the kids seemed to get it. Phew!
A few "Ticket Out the Door" Responses


Until next time,
Mrs. J